
Scan Procedure
The scan procedure is predominately automated and being self-paced, the total time needed for a scan depends on the individual. The time can be minimised by limiting some of the features in the settings menu. Once the personal details are entered, the exercises take approximately four to six minutes to perform. Longer time may be needed if movements need to be repeated, if the person moves out of the scan area, if a third person walks into the scan area, and if optional surveys are completed.
It is necessary to standardise the scan procedure as much as possible, and this requires some preparation, to minimise variability and get a proper data analysis. See the Scan Preparation section for more detail.
1. Login Posture Scan
Click on the Qinematic Posture Scan icon on the desktop to open the software.
Enter login details to authenticate an active subscription. Scanners, Advisors and Analysts can perform scans if an organisation’s Administrator has given them rights to start Posture Scan.
2. Automatic calibration
Each time the software gets started, it is necessary to calibrate the scanning system. Furthermore, calibration is needed each time the sensor moved, or the software is closed and restarted.
3. Main page of Posture Scan
This is the first screen experienced by the test person. They can proceed with the scan independently from this point onwards. Some personal details are required before the actual recording of movement begins.
In the event changes to Settings are required, the toolbar can be accessed by clicking ‘ESC’ on the keyboard. Otherwise, touch the screen to continue.
4. Select language
Choose a language. Currently the whole system is available in three languages (Swedish, English and German).
5. Privacy policy
It is essential that each user gives informed consent. They must read the Privacy Policy and check the box to consent. The full privacy policy can be read via the link in the text. To progress forward, press the ‘OK’ button to the bottom right of the screen. To go backwards, press the back arrow to the bottom left of the screen.
6. Person Identification
Enter an email address or Personal Identification (PID) so that the test person can be identified in the future, and past scans can be retrieved. It is the PID of the individual doing the scan, and not the address of the Provider. Please choose a unique and memorable PID. This is typically a personal email address, personal number, tax number or membership number. Personal information is not intended to be shared with third parties.
7. Confirm identification
The test person is asked to check the email address and confirm that the spelling is correct.
If the spelling is incorrect, press the back-arrow key to make the relevant changes on the previous screen. Repeat the process and press OK to continue.
8. Personal details
Personal details allow us to use aggregated data for creating helpful analytics, and comparing performance to normative data.
9. Weight
Enter weight in kilograms. Weight is important for calculating body mass index (BMI), a measure often used by doctors and researchers.
10. Dominant side
The preferred limbs used to perform major actions.
11. Discomfort and falls
It is good to know if there is any recent discomfort in the body. Even low levels of discomfort can affect or be affected by movement. It is also helpful to know if there is a history of falling in the past year. Individuals are given slightly different tasks according to what thy report. If the individual has not history of falls and reports experiencing no discomfort, the process skips to step 14.
12. Discomfort body chart
If discomfort is reported, then the person is asked to show the general location on a body chart. There is no distinction between front and back of the body. Both low and high levels of discomfort should be reported.
13. Practice the exercise

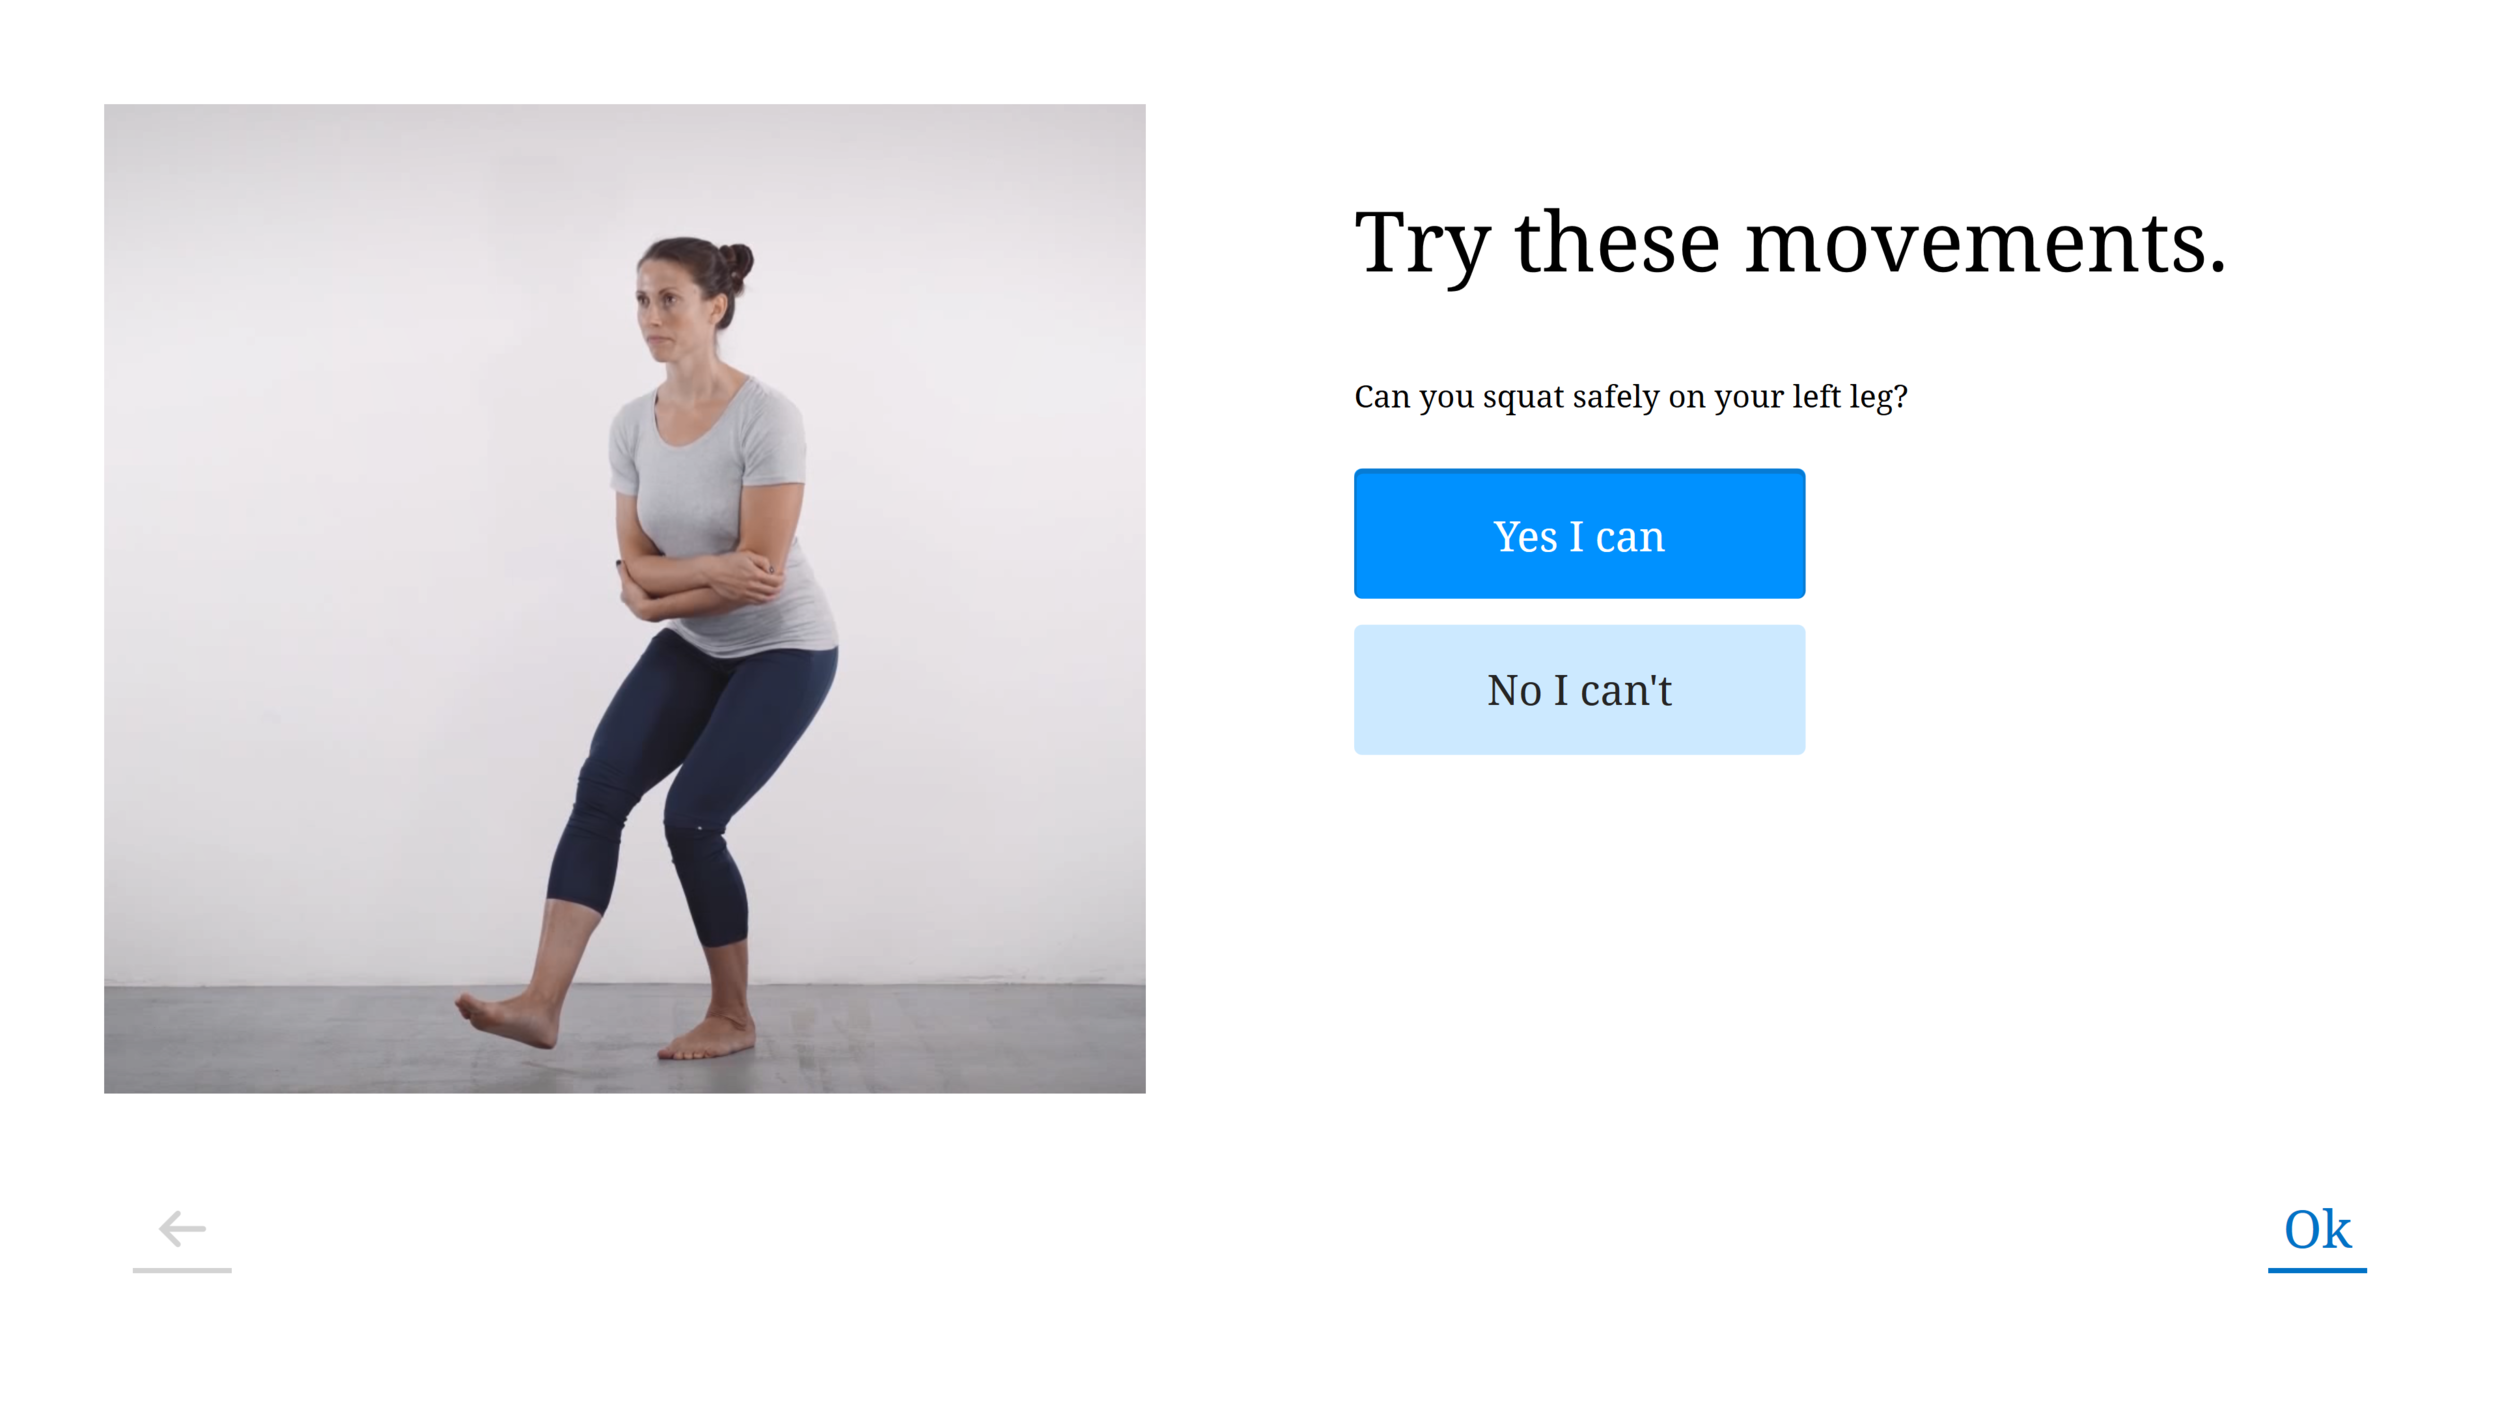


Age, history of falls and discomfort levels are used to determine if the person needs to verify if they can safely perform standing balance and single-leg squat before dong the scan. This is to prevent any injuries occurring during the scan. The test person should practice each exercise and choose if they can do the scan voluntarily, and on their own without assistance. Please offer supervision as required.
14. Preparing for a good scan
Recording good quality data is important for good analysis. Good data comes from wearing tight underwear or training clothes when possible. Best data will be achieved when a person wears short underwear and exposes mostly bare skin. More details about suitable clothing can be found here.
15. Simple scan instructions
This screen gives three very simple instructions about what to expect during the test:
‘Practise each movement with the instruction video’.
The person will first see an instruction video to explain what movement is expected of them. They are asked to practice along with the video prior to the recording. This is important for improving the repeatability of testing.
The instruction video will show the movement as though looking at a person through a window. The instructor’s left will be the test person’s left. When the person performs the test, the image on the screen will be like looking in a mirror. The video’s left will be the test person’s right. This is a characteristic of the Kinect sensor, and cannot be altered.
‘Nod when you are ready to perform a test’ or say ‘I am ready’ to start the test.
This screen explains that the person must nod their head to trigger the recording screen of the exercise, or
Say ‘I am ready’ to trigger voice activation.
‘Perform the movement’.
The person copies the task as though watching someone in a mirror. The instructor’s left will be the test person’s right.
The person should follow the same tempo, and try to copy the task in a manner that is natural to them.
There are controls for the way the person executes the task. If it does not resemble the movements in the video, then the person is asked to repeat the task again.
16. Demo video option
If the system recognizes an existing PID it is assuming that the test person has done a scan in the past. If the person can remember the instruction videos from the previous test, they are given the option to do an express scan, without demonstration videos. They simply follow the video that accompanies the recording mode. To avoid irregularities, it is recommended that individuals use the demo video option.
17. Safety warning
Safety is a top priority. Although the tasks are very basic, if there is any obvious risk of injury to the test person, ensure there is supervision or abort the test. A person should be able to ask for help or assistance if they cannot perform a task. Press ‘Begin scan’ to start the procedure.
18. Standing area
The test person is asked to move to the green box, seen on the screen. The software will increase the volume of the voice as the person walks away from the screen. Once in the green box, the clothing will be scanned for suitability. If the clothes are not suitable, then a message will appear asking for a change in clothing. See the Clothing section here.
If the clothing is suitable, the scan will begin.
19. Test sequence and exercise
Each exercise starts with a demonstration video. It will explain how to stand and how to perform the exercise. The test person is asked to copy the demonstration video, before the recording and during the recording, so they should have completed at least two repetitions for each scan. This helps to minimise the influence of a training effect on scan data from novices.
19. Head nod
The test person is asked to nod their head to initiate a recording. The screen is initially blue, with the subject’s head in a circle.
Performing the nod at the right speed and depth will fill the screen with green color, and the instructional video and recording will be triggered to start.
20. Successful nod screen
A successful nod or voice activation will make the blue screen turn to green, and the recording will begin.
It is also possible to say ‘I am ready’ and the voice recognition will start the scan.
21. Exercise screens
3D movement data is recorded while the instructional video is played. The test person copies the instructions as though looking in the mirror, with similar timing and technique. There are seven simple exercises including - standing still, side bending, double leg squat, single leg balance and single-leg squat. They are carefully selected tasks and presented in a particular sequence.
22. Scan completion
When the exercises are completed, the test person is requested to approach the screen to view the scan results. Several options are available at the end of the scan, depending on the Settings defined by the Provider or the Administrator of the Organisation.
23. Post Scan
Feedback
If enabled in Settings, the Feedback screens communicate performance through 3D video and carefully selected measures. There is also self-directed audio for each screen. Feedback can be viewed by the test person independently or with the advice of a health advisor.
Sharing a report
Options for sharing reports are available in Settings. They include Send/Share/Print a Summary Report. Movement Lab can also be opened directly from Posture Scan immediately after scan conducted on the same computer.
Survey
After the physical test, there is an option to complete surveys. For example, the MADR-S is used measure mood and risk of depression.
24. Scan completion
Always remember to logout from Posture Scan to avoid data leakage and unauthorised use. Click on ESC and then log out by clicking on the user account name and then choosing logout.